Backups: What are they? Why do I need them? How to do it! Includes full details of how to back up a WordPress website manually without a backup plugin using the hosting control panel and how to create an automatic scheduled backup by using the ever-popular UpdraftPlus backup and restore plugin.
Why Do I Need To Backup My WordPress Website?
Regular backups are an essential part of any Website maintenance plan. Having an up to date website backup available means that in the event of something going wrong, such as a site getting hacked, it can be fully restored with minimum fuss and disruption to your business.
It is especially important, and in fact vital, to always make a full backup of your Website (all site files and database, if it includes one), before making any major changes; such as updating the themes, plugins, and software.
How Often Should You Back up?
When deciding on a backup schedule, or how often to back up your website, you need to consider the type of site you have and how frequently the content changes. For example; you might have a simple ‘brochure’ style website for a small business where the text and images are rarely changed, or you might be running a blog site where new articles are added several times a week. Alternatively, you could have a busy eCommerce store processing multiple customer orders throughout the day.
Each situation will require a different backup schedule:
| Website Type | Content Change Frequency | Backup Schedule |
| Small business ‘brochure’ | Rarely | Monthly or when content changes |
| Blog / News Site | Several times per week | Daily |
| Photography Gallery | Most weeks | Weekly |
| Online Shop | Frequently each day | Hourly |
How Many Backups Should I Keep?
Now that you have a good idea of how often to back up, you might also be wondering how many backups to keep?
Again this depends on the situation: A site that rarely changes will require you to keep only the most recent backup. Whereas a site that is in development or being updated and changed regularly will require a full backup at each major change or update.
I have read that a ‘rule of thumb’ is to keep three copies in different places; i.e. on the server, on your local PC or Mac and another copy on a separate drive. However, this doesn’t take into account how frequently a site changes; and for a busy site, this approach could generate a lot of work.
Personally, I believe in keeping things simple and pain-free. So where possible I would advise taking full advantage of automatic scheduled backups and cloud storage, whether that is using Google Drive, DropBox, Microsoft’s One Drive, the UpdraftPlus Vault, or any of the others available. Using cloud storage should ensure that you always have a backup file available.
Video Tutorial
If you prefer watching to reading then click below. If not, please read on!
So, how do we go about backing up a Website?
There are different ways of going about it. At its most basic; a backup is simply a copy of all of the Website files. So, if you have the know-how you could use FTP or Secure Shell to download a copy of the files from the Website server to a local machine. However, this isn’t the most efficient method and it is prone to errors.
So I want to look at a couple of more reliable ways of backing up a website. First I’ll create a backup manually using the Website hosting control panel and then I’ll take a look at backing up using a WordPress backup plugin.
Creating A Manual Backup Using The Hosting Control Panel
If you have access to your Web hosting control panel, then a manual backup is by far the most reliable method and the one I would recommend. Especially if you are backing up prior to making any major changes to the website itself.
The first thing you need to do is log in to your hosting control panel.
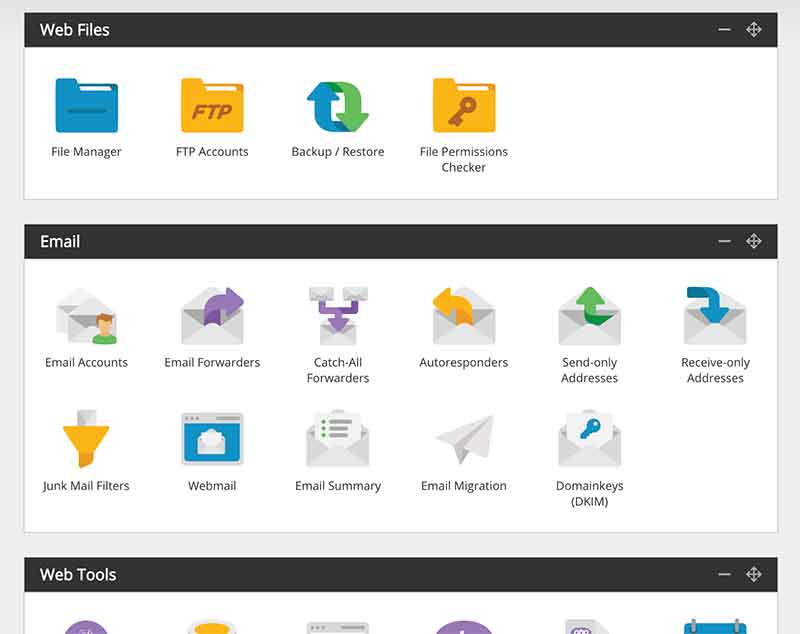
When you have logged in you should see something like the above screenshot with icons for the various tools. These will vary depending on the type of hosting account you have, but in amongst these icons there should be one for the backup/restore application.
So, to start your backup, simply click on the icon.
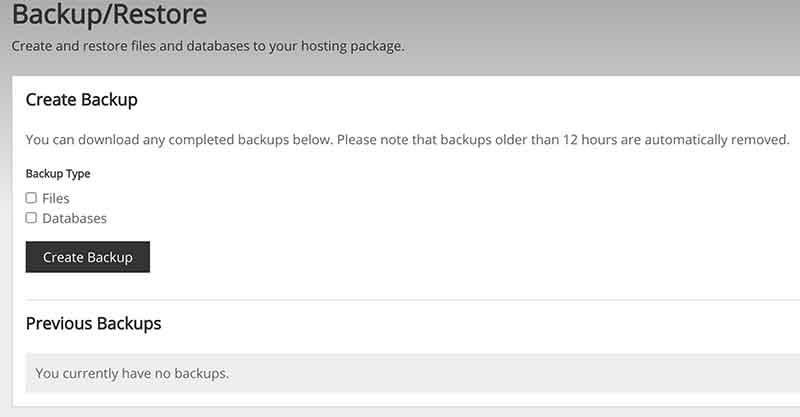
You will see from the above screenshot that I have the option of backing up just the Website files, the MySQL database (or databases if there is more than one), or both. To make a full backup of a WordPress website, or any other typical CMS, you will need to make a copy of the database, so select both.
Once you have made your selection, click on the “Create Backup” button.
Depending on the size of the Website, it could take several minutes for the backup file to be created. When it is created a download link will appear.
The backup file by default will be saved on the server usually in a folder called, you guessed it, “backups”. However, these files can be deleted automatically by the host after a certain amount of time, so it is important to click on the download link and save the file somewhere apart from your Website files – I will typically save my backup files to a folder in My Documents called “Website Backups”.
At this point, you should note that the file that has been created has the date and time of the backup automatically appended. Which is useful if you have several previous backups and you want to find the most recent.
Restoring A Backup
Using the Web hosting control panel makes it very easy to restore a site if disaster does strike as it is pretty much just a reversal of the above process. Simply locate and upload your backup file, make the appropriate selections, click on “Restore Backup” and hey presto!
Automatic Backups
Most hosting companies will offer automatic timeline backups but this will usually incur an extra cost. Depending on the type and scale of your website and your business the extra cost incurred for your host to look after automatic backups on your behalf could be well worth it. However, for smaller sites, or those on a budget, there is an alternative way to put the backup process on autopilot…
Using A WordPress Backup Plugin To Create An Automatic Backup
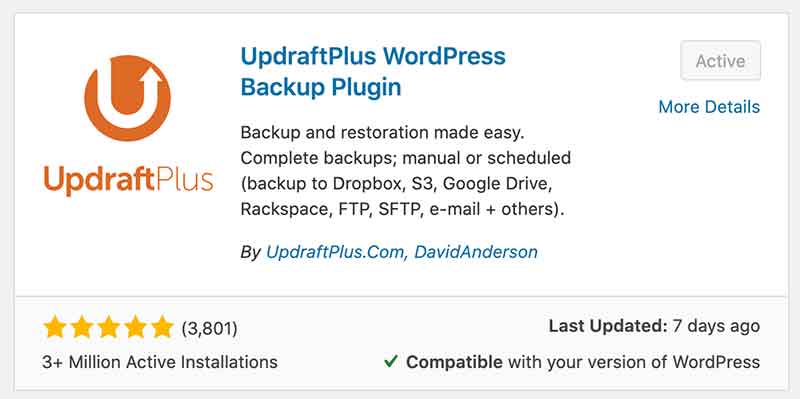
If you’re an experienced WordPress user you will know that there is usually a plugin for any situation, and backups are no exception. There is quite a choice of backup plugins, but the one I recommend for WordPress backups is UpdraftPlus.
How To Backup And Restore Your WordPress Website With UpdraftPlus
The first thing you will need to do is install the plugin. In your WP dashboard click on Plugins / Add New and do a keyword search for “updraftplus” (all one word). You should then install and activate the plugin.
If you have installed a fresh copy of UpdraftPlus a settings wizard will start up when it is first activated. This will guide you through the various options and typical settings needed to create your WordPress backups. The settings required for a typical backup solution are pretty straightforward but I will go through them here.
The first thing to note when viewing the the plugin’s settings is that there are five separate tabs. But don’t be put off by the apparent complexity because everything we need to set up an automatic WordPress backup is found in tabs one and two.
You will see on tab one that there is a big blue button labelled “Backup Now”. This enables a quick and easy manual backup which is great if you’re about to update a theme or other plugin and want to ensure you’re covered if anything goes wrong.
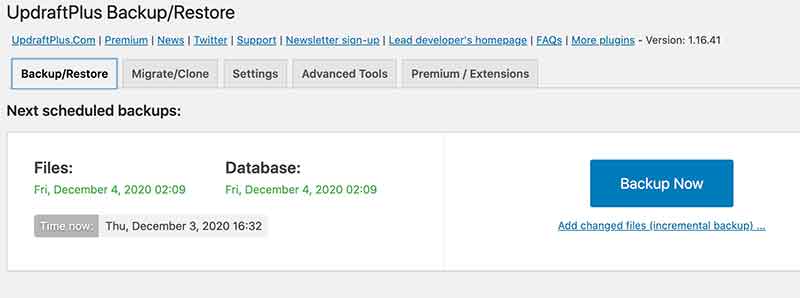
This tab also shows the date and time of the next scheduled backup and below that the details of any existing WordPress backups.
The second tab (Migrate/Clone) is a premium feature which enables a temporary copy of the website to be created on their servers. A very useful feature for developers as it allows testing away from the live site.
The main backup settings are found on the third tab. Here we can set our files and database backup schedule and choose a remote storage location, such as Google Drive, DropBox, etc. You can also choose whether or not to backup the website Plugins, Themes, and Uploads folders and how many previous backups to save.
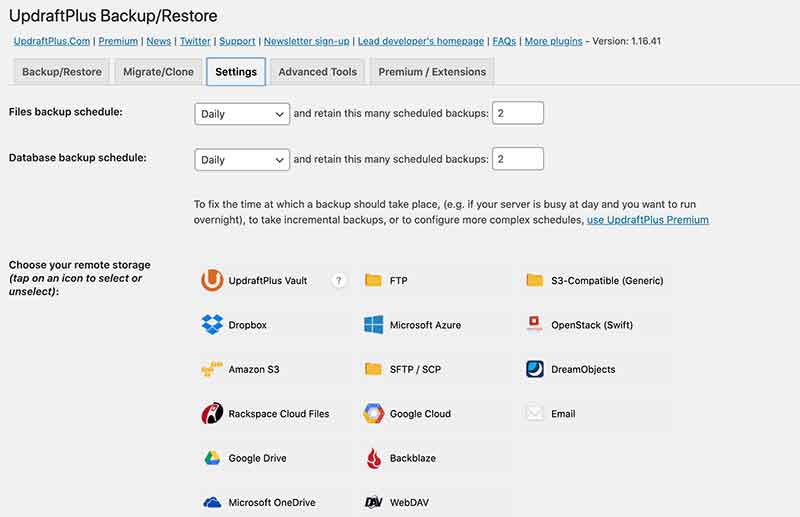
When you have made your selections click on the “Save Changes” button near the bottom of the page to commit and you will have enabled an automatic scheduled program of regular WordPress website backups.
The third tab features advanced tools which you should not need to worry about. It even states: “Unless you have a problem, you can completely ignore everything here.”
Finally, the fourth tab details the features of UpdraftPlus Premium.
Using a backup solution like Updraft Plus will allow you to create a copy of the main WordPress files and the WordPress database very easily from within the WordPress admin dashboard. The real beauty of it is that you can set it to work automatically so that it creates your backup at the same time each day without any prompt or reminder. As I said earlier, I like to keep things simple and pain-free wherever possible, so Creating an automatic backup certainly ticks that box as it means one less thing to worry about!
Another thing that makes this plugin special is that you can choose to automatically save the backup file to your cloud storage such as Google Drive, iCloud, etc and you can also set the number of backups which are kept so that your cloud space doesn’t get used up by old backups.
UpdraftPlus Premium
The premium version allows you to create automatic backups more often than daily and includes the UpdraftPlus vault which includes 1GB of storage so your backups won’t eat into your other cloud storage space. If the premium version ticks the boxes for you, please show some love and use my affiliate link below. It won’t cost you anything extra and will help to keep me producing articles like this one 🙂
Thanks for reading!